Easy To Make
A faux wood photo backdrop surface is easy to make and much less expensive than purchasing a real wood photo backdrop! This DIY project is perfect for any photographer.
A Gift For Me
My husband received a bonus for this month's work performance and given several great prizes from which to choose; a golf putter, outdoor propane heater, gas grill and many more "manly" toys. Instead of choosing something new for himself, he ordered a new Sony Alpha A3000 Digital Camera , for me!
New Camera
I've hoped to win, or buy a Canon EOS 1D Mark III, but the body alone is $4000.00. I was so thankful my husband decided to share his bonus with me, fulfilling my three-year wish to own a new "big girl" camera. Sadly, I will have to wait until my hobby turns into a real paying job to buy the Canon, or I get lucky enough to win one.
There was only one camera in the gift packet, a Sony Alpha A3000 Digital Camera. My research proved that the Sony A3000 averages about 4 stars and has garnered a lot of great reviews. However, one reviewer suggests that the camera is less than desirable for professional photographers but appeals to folks like me, that are happy to get an inexpensive SLR with generally good quality resolution. I'm only a hobby photographer and happy to have the new Sony furthermore, it's a big step above my earlier point and shoot, Canon PowerShot.
Test Drive
After taking my new camera for a test drive, I couldn't be more pleased! It has great clarity for macro shots (compared to my old camera), options to defocus the background, change aperture, and color settings and a plethora of other functions that I'm still learning to use. My only regret is that I don't have a telephoto lens however, I plan to buy one in the near future.
Now that I have an almost professional camera, I've gone into a frenzy of taking pictures of anything that walks, talks, moves, doesn't move etc., and head-long into designing my own personal photo studio.
DIY Project
My first photo project was to create new photo surfaces; it's amazing how faux backgrounds can make a good photo, look great. I've also created a new light box using foam board, but I'll have to save that DIY for another post.
Foam Board
I opted to use foam board instead of real wood because it's lightweight and easy to store when not in use.
I painted both sides of the foam board surfaces, giving me a total of four different backgrounds for my work, and I still have leftover paint to create more boards.
I created a baby blue, distressed wood surface, a natural dark wood finish, and a bright yellow and white board, and the last surface is a work in progress.
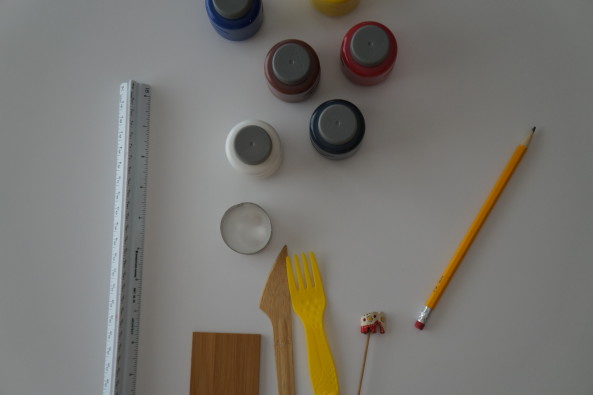
What You Will Need
You will need: two, two packs of foam board, and inexpensive acrylic paints, in various colors; blues, white, browns, and yellows, and one wide paint brush (any old paint brush will suffice). A few tools from your kitchen or garage to distress the boards ie., wooden skewers, butter knife, plastic fork, sponges, plastic cups etc., nothing fancy.
I splurged on two jars of Americana® Decor™ Products Chalky Finish and Creme Wax (8.99 each and not pictured), to seal the paint and give my faux wood boards a matte finish.
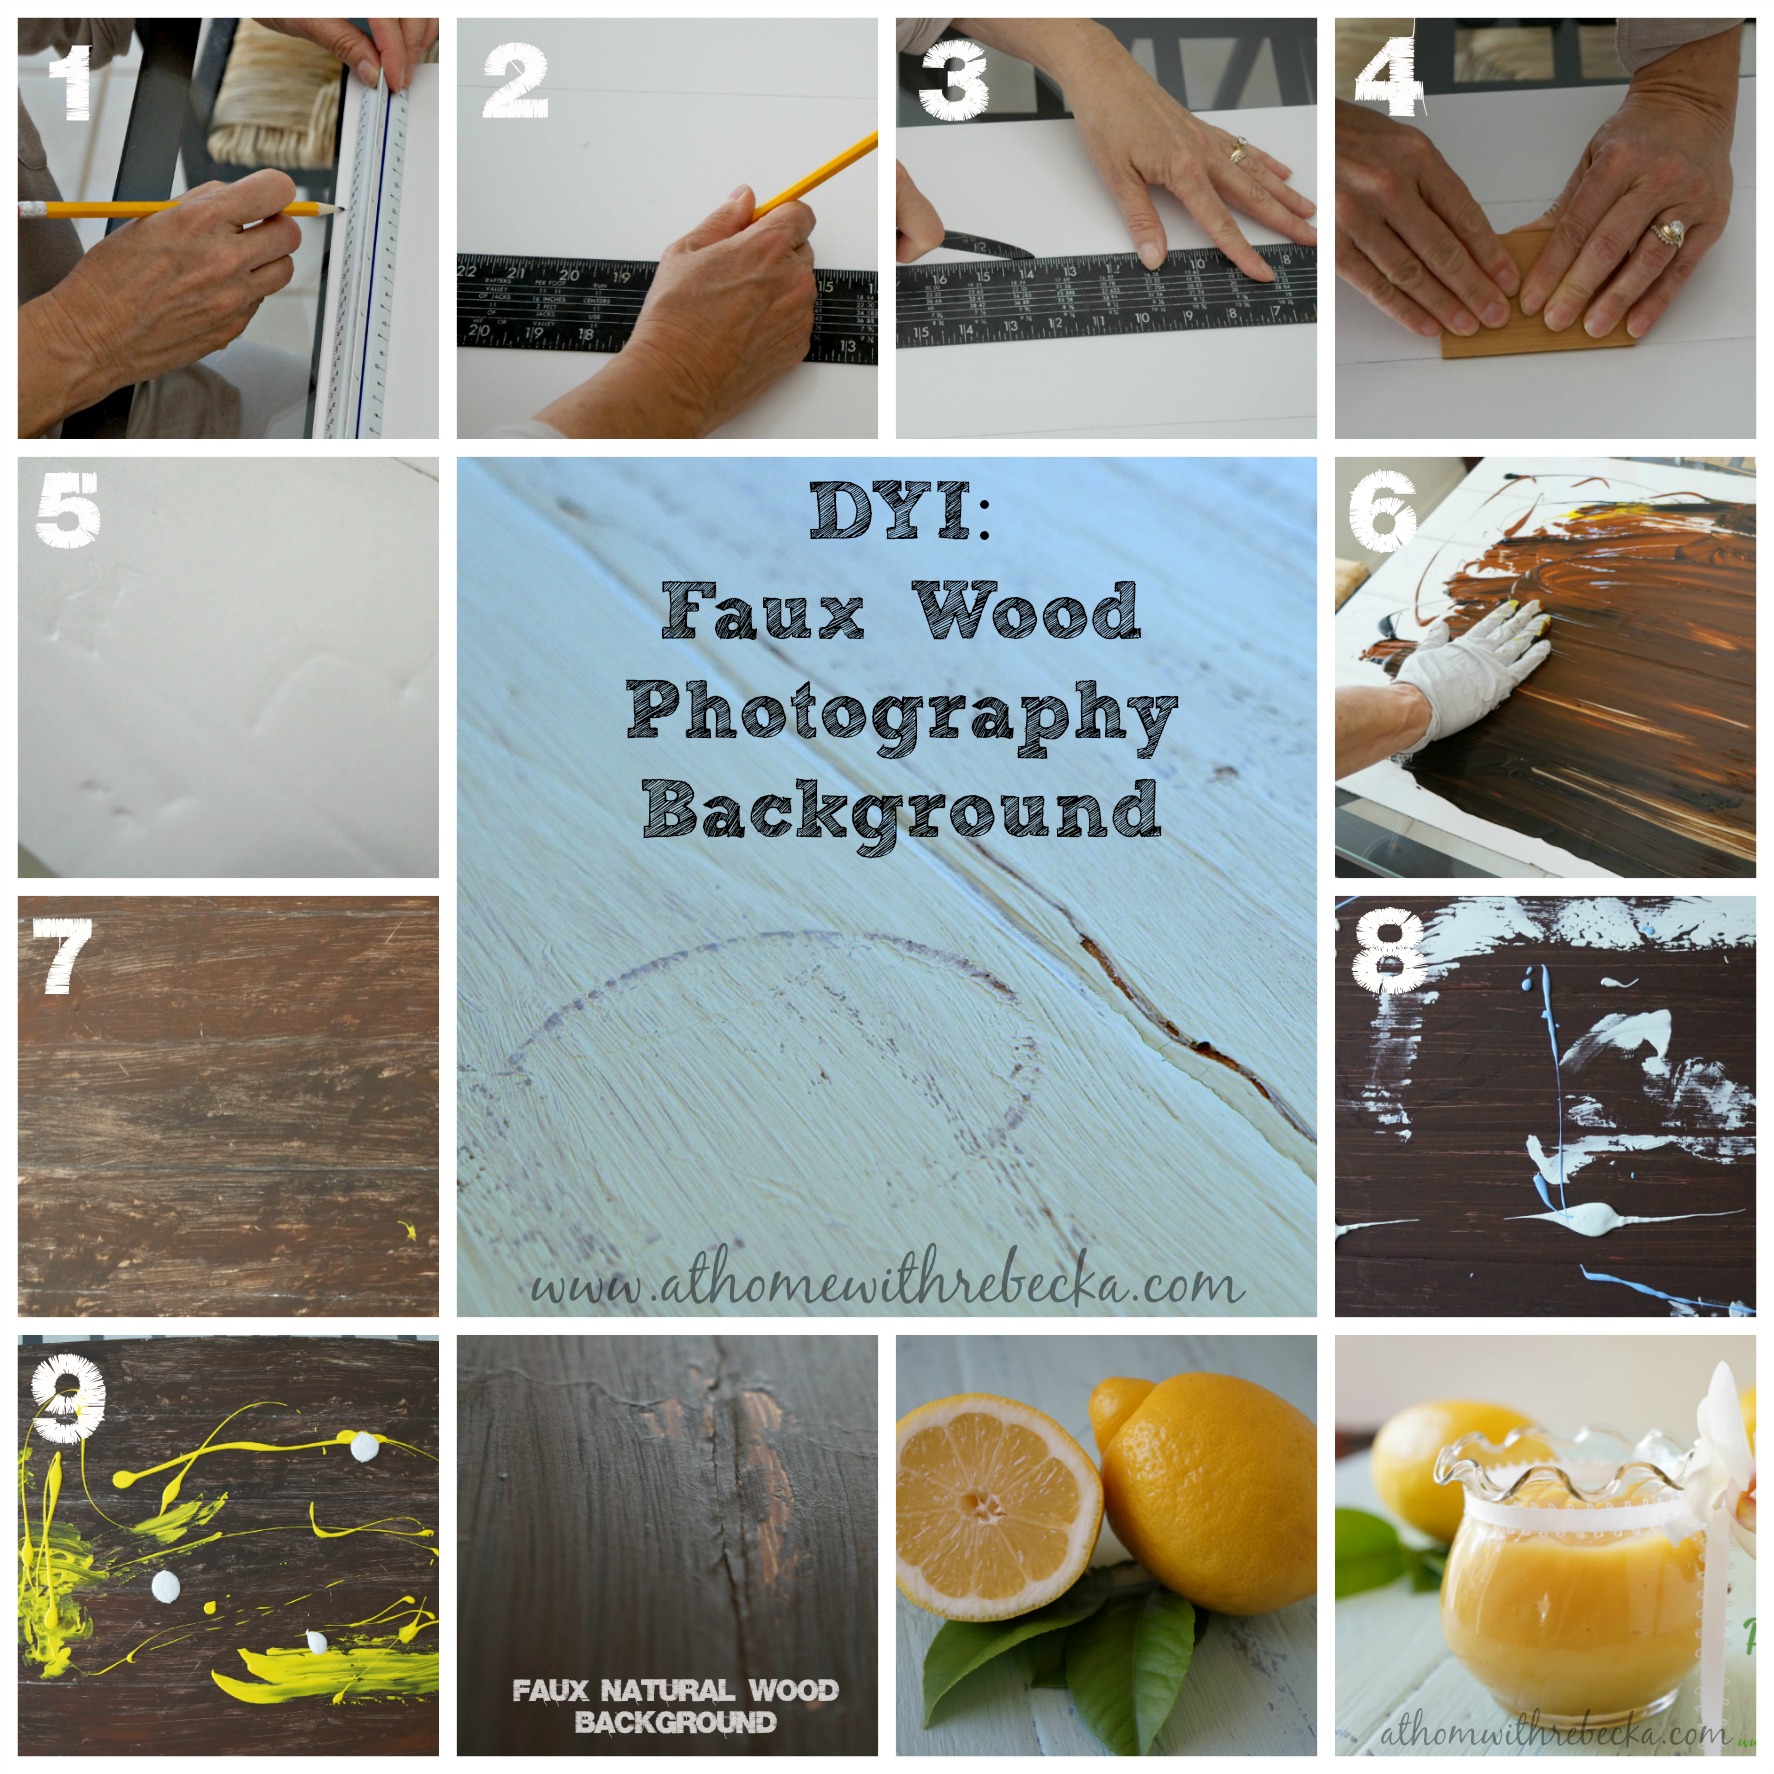
Below, you will find the step by step instructions to make a faux wood surface. Feel free to print a hard copy of the instructions for later use.

DIY: Faux Wood Photo Surfaces- Distressed Baby Blue Board
Ingredients
- Acrylic Paints
- For the bottom layer: 1 medium brown 1 light brown, 1 black, and/or other dark reddish brown tones.
- For the top layer: Use a minimum of 3 different shades of blue and 1 white
- 2 Foam Boards
- 1 jar Americana Decor Creme Wax optional
- Kitchen utensils
- Paint Brush or sponge
Instructions
- Distressed Baby Blue Faux Wood Surface
- To begin, place one foam board on a flat surface
- Using a ruler, mark 4 inch increments across the short side of the board
- Draw a line the length of the board for each increment, keeping the edges straight with a flat surface
- Using a butter knife, score each line firmly, do not cut through the board
- To create a beveled look, press each line firmly with a cornered box, piece of wood or butter knife, you will have to press hard
- Distress foam board with kitchen utensils, cups etc. to create bumps, lines, and knicks
First Layer of Paint
- Drizzle a combination of browns and black paints over the board, smooth the paint with a gloved hand, rough paint brush or sponge, to give the illusion of wood grain, until the entire board surface is covered with paint. Add more paint if needed
- Allow board to dry completely
Second Layer of Paint
- When the board is dry, drizzle white and blue paints, in various shades over the brown surface
- Smooth over board using lengthwise motions.
- Allow board to dry completely
- Using a paint brush or sponge, spread a thin layer of Americana Decor Creme Wax over painted board. Allow the wax to dry completely before use
Notes
- It's imperative that you have patience during the drying process. If the first layer of paint is wet (feels cold to the touch) the second layer will pull the first layer off.
- Painting both side of the board helps to reduce warping. If the board refuses to lay flat, store in a dry place under a heavy box or other heavy object.
- Have fun!
Beautiful Photography Backgrounds
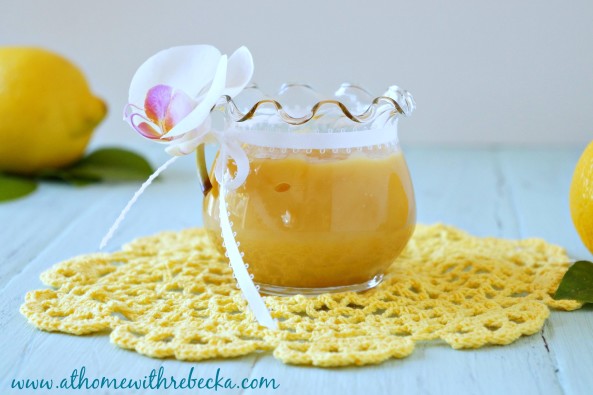
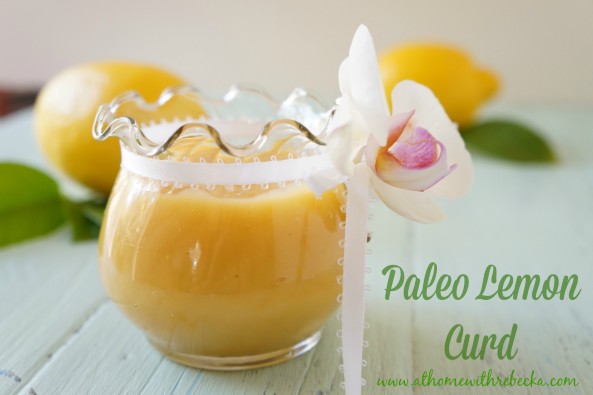
I wanted to give you a taste of the finished faux wood project in action, so I whipped up a batch of Paleo Lemon Curd. I knew the bright yellow color of the tart cream would really pop on my new distressed baby blue surface.
Doesn't the faux wood surface look amazing and like real wood?
By the way, I think my camera did a superb job capturing the creamy essence of the subject. What do you think?
Ann Low says
Hi Rebecka, Thank you very much for the tutorial. The foam board looks so real like natural wood after the painting. Definitely love to try this too. 😀
athomewithrebecka says
Hi Ann, you're very welcome. I was so pleased with the result let me know if you give it a try. I'm interested to see if I made the steps clear enough for someone else to follow!