DISAPPOINTMENT
My disappointment was palpable this year after learning the 9th Annual World Food Championships (WFC), one of the largest events in food sports, had been canceled due to the COVID-19 pandemic. WFC 2020 was scheduled to take place this fall in Dallas, Texas.

While I may have been severely disappointed about the cancellation of this year's competition, imagine the organizer's lament after long hours of planning and preparations to conclude that it just wasn't safe to hold WFC 2020.
Equally disappointed upon hearing the news are the 1,400 cooks from 42 states and 15 countries.
Some Good News:
However, despite the recent cancellation of this year's event, WFC will now host a $25,000 virtual contest for all 2020 registered contestants. WFC will also launch a robust marketing campaign to keep Food Sport alive and growing with fun integrations for all existing WFC sponsors.
Read more about it HERE.
TEAM ANNOUNCEMENT
I've been looking forward to the opportunity to #TakeBackMyTitle as Bacon World Champion at WFC 2020, announcing my new team for At Home with Rebecka, and sharing a few new collaborations with new sponsors. Unfortunately, after a year of recipe creation, preparation, and practice; that dream has to wait until November 2021.
I was scheduled to meet with my team members at the end of the month for WFC recipe practice. Despite the event cancellation news, I'm happy to report they will still be arriving in Houston for a weekend of food and fun instead. I will announce my At Home with Rebecka Team members after their visit so I can share fun photos of our time.
More Good News:
From big disappointment comes true inspiration. One of my new collaborators was kind enough to stick with me from now until WFC 2021.
INSPIRATION
I was honored by the generosity of Fresh Origins to support my food sports journey by supplying free products for recipe creation and contesting at WFC 2020. I'm grateful for their continued commitment despite the event cancellation.

Beautiful Food Inspiration
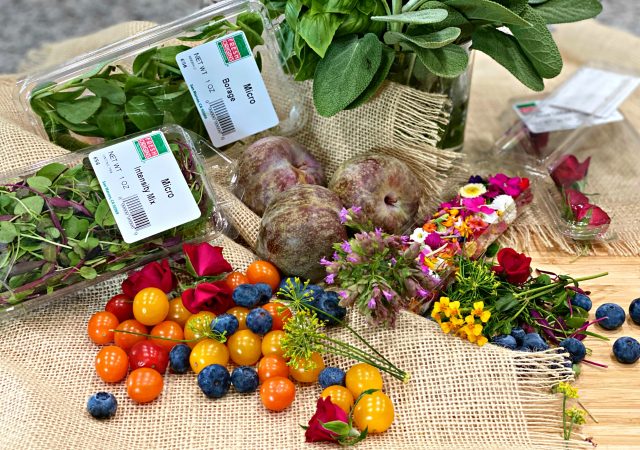
In honor of Fresh Origins' generosity, I'm using their incredible, edible inspiration for recipe creation throughout the year and at WFC2021.
Fresh Origins is America’s leading producer of Microgreens and Edible Flowers! In addition, we grow Petite®Greens, Tiny Veggies™, Herb, Flower & Fruit Crystals®, and other unique specialties near San Diego, California. Our ideal growing climate allows us to produce a Microgreen that is robust, healthy, highly flavored, and long-lasting.
Source: Fresh Origins MicroGreens
Today's recipe creations were a labor of love, inspired by fresh produce from my garden, local organic market, and shipment of Fresh Origins, micro herbs, herb flowers, and MicroGreens.
FOCACCIA ART BREAD
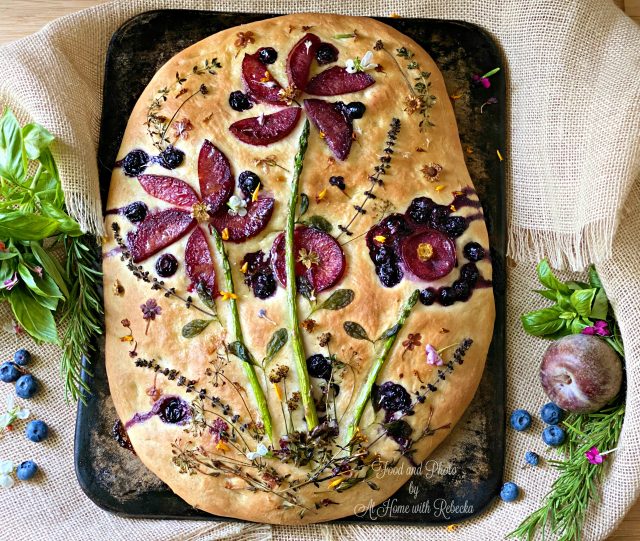
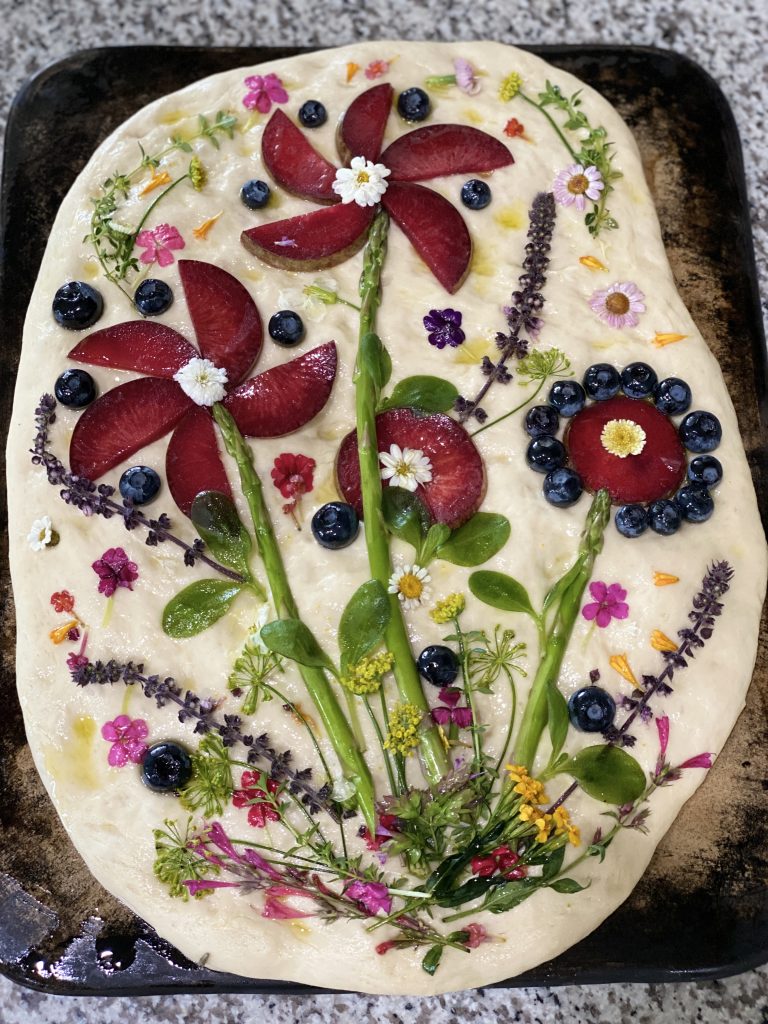
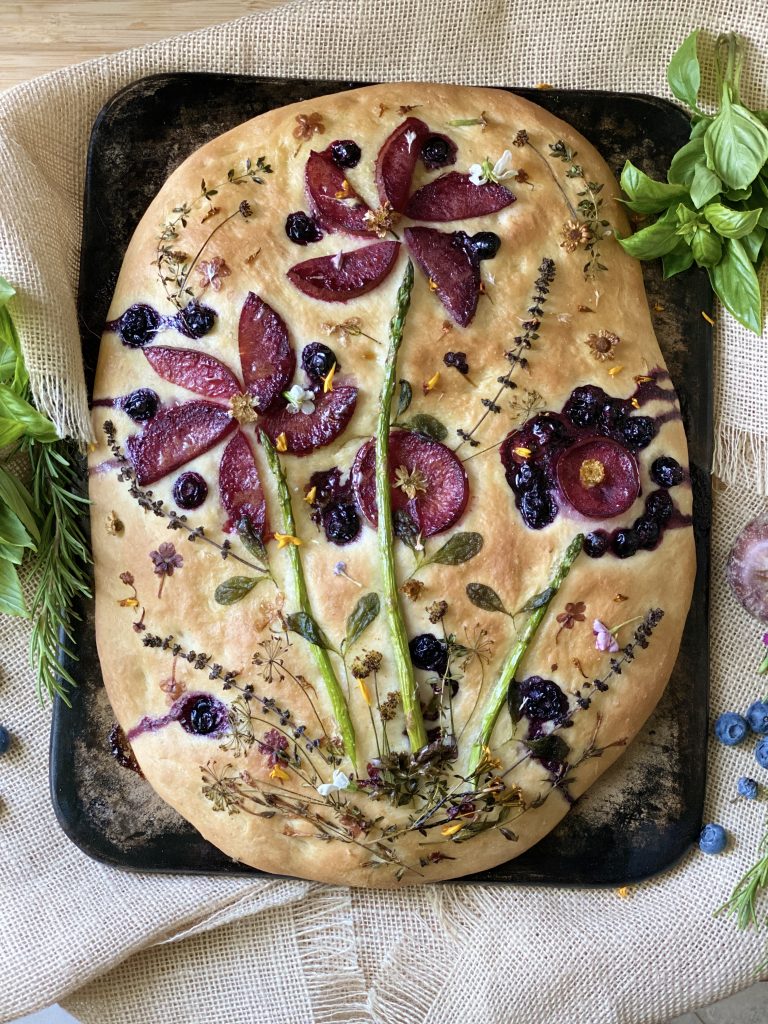
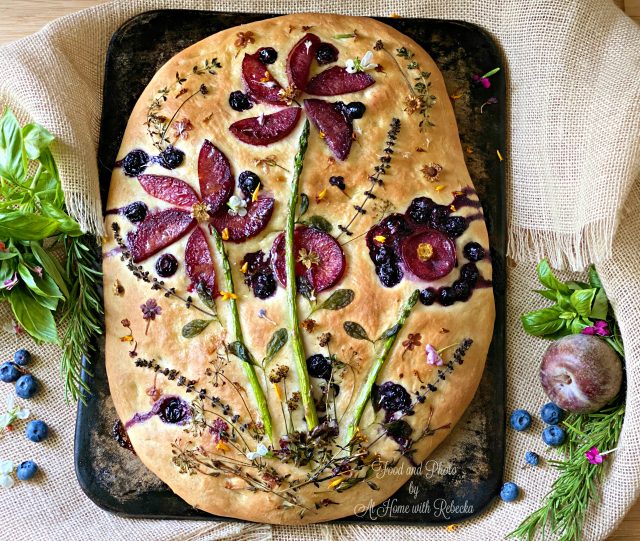
Plumcot Blueberry Herb-Flower Focaccia Art Bread
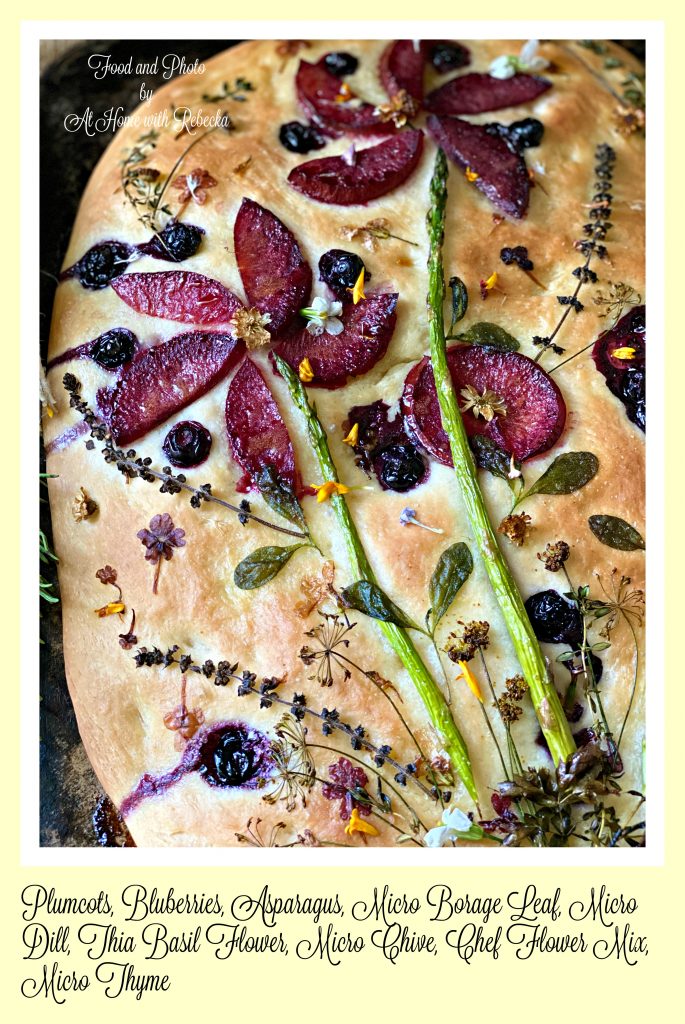
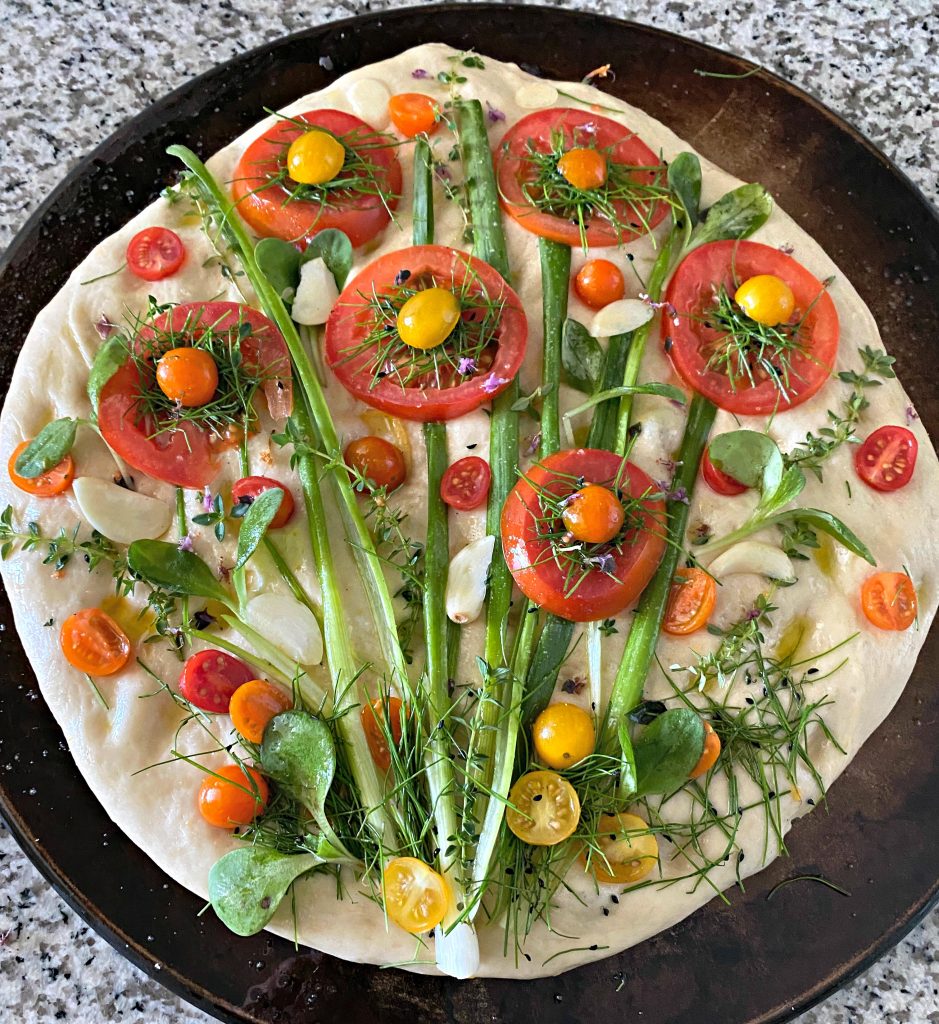
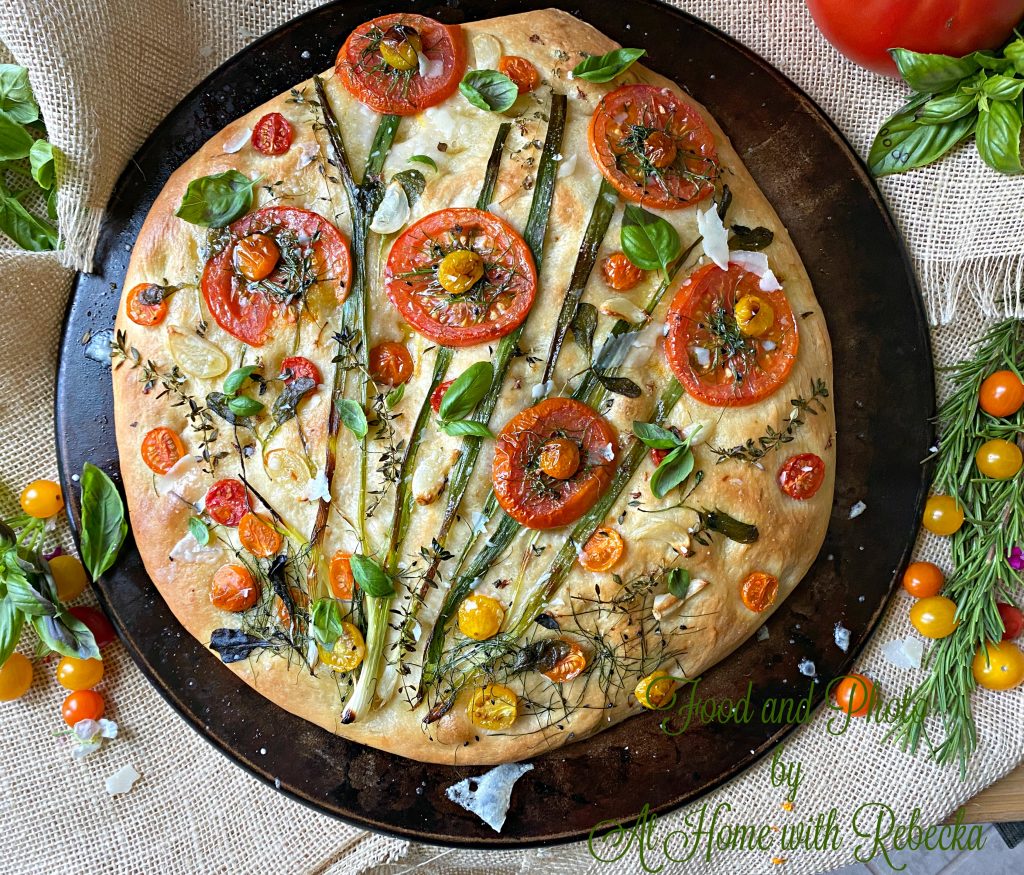
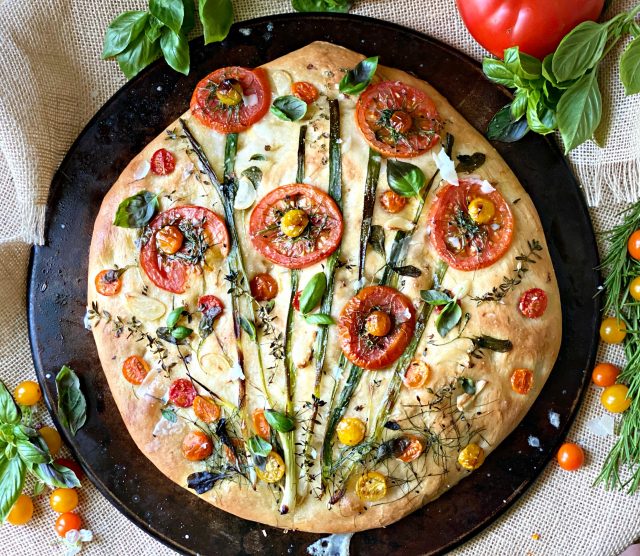
Tomato Herb Focaccia Art Bread
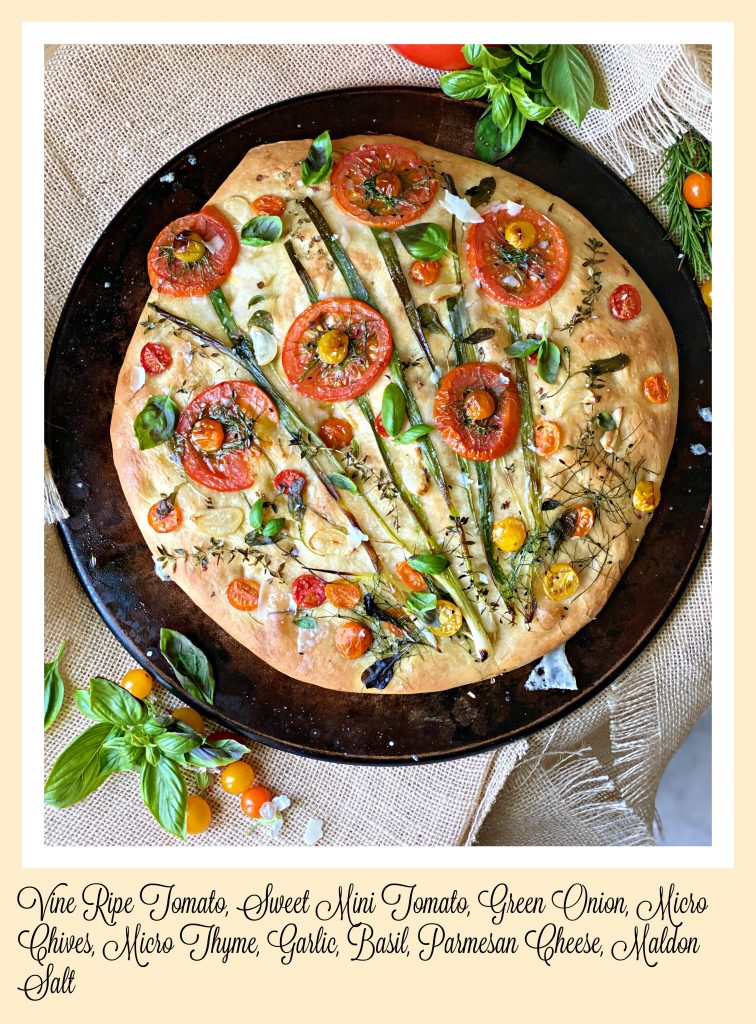
Baking focaccia bread is a family tradition as well as the use of edible flowers and herbs, as decoration and flavor enhancement but this was my first foray at making Art Bread. I loved it! Baking bread and making art with food is like meditation, and the best part about it is that you get to eat it when you're done!
EASY TO MAKE AND FORGIVING
Focaccia bread is one of the easiest and most forgiving homemade bread recipes to make and the perfect bread for the beginning bread baker. It's also the perfect project for homeschooling mothers and fathers. The recipe encompasses Art, Reading, Group Projects, and Arithmetic. The results; one day of classroom studies accomplished and dinner is on the table.
FOCACCIA ART BREAD
Ingredients
- 16 ounces 454 g warm water 110 F divided into two bowls. 1 cup of warm water per bowl
- 1 Tablespoon granulated sugar
- 7 grams 2 ½ teaspoons active dry yeast
- 2 ounces 57 g olive oil ¼ cup
- 1 teaspoon fine ground Himalayan salt
- 1 teaspoon Flake salt
- 24 ounces 680 g or 5 cups bread or all-purpose flour leveled
- 4 ounces 113 g or ½ cup olive oil for the pan and drizzling on top of the focaccia after rising
- 3 purple plums or plum-cots seeded and sliced thinly
- 1 cup blueberries rinse picked over for stems and towel dried
- 1 small bunch asparagus
- Misc. herbs herb flowers fruits, vegetables, meats
For the Tomato Herb Focaccia:
- 2-3 medium sliced tomatoes
- 1 cup sweet mini tomatoes
- 3 cloves garlic thin sliced
- 1 bunch green onions slice lengthwise
- ¼ cup shaved Parmesan
Instructions
- Combine one cup of water with yeast, and sugar and mix to combine. Set aside for about 5 minutes or until the mixture is foamy. I use a candy or meat thermometer to determine water temperature is about 110 degrees before adding the yeast.
- Place the water yeast mixture into the bowl of a stand or Ankarsrum mixer fitted with dough hook and scraper. Dough can also be made by hand using a large bowl and your hands.
- Add 1 cup flour to the yeast mixture and mix on low until combined
- Add remaining water, olive oil, salt, and half of the remaining flour. Mix on low until well combined.
- Continue adding flour while mixing on low until the dough pulls away from the sides of the bowl. If the dough is sticky, add more flour 1 tablespoon at a time until it comes together. This dough is very soft and tender to the touch.
- Keep mixing in the bowl to develop the gluten. The dough is ready when it bounces back from pressing.
- Dough can also be finished on a floured surface. Knead for 3-5 minutes or until the dough bounces back.
- Oil a large bowl with a Tablespoon of oil and place the dough inside. Turn the dough a couple of times to oil the entire ball. Cover with a clean dish towel or plastic wrap and let it rise in a warm place for 1-2 hours or until doubled in size.
- Pour enough oil into two 12"X17" sheet pans (Or similar size pan. I prefer pizza baking stones) so there is a thin layer of oil covering the enter bottom of the pan.
- Put some olive oil on your hands to prevent sticking and then pull the focaccia dough out of the bowl. Divide the dough into two equal portions. Lay one of the sections into a pan and begin stretching the dough to fit the form of the pan. If it starts to shrink, walk away for a few minutes to allow the gluten to relax before trying again.
- Cover the stretched dough with plastic wrap and place in the refrigerator for 25 minutes or overnight. The longer the dough rest, the better the flavor
- While to dough is resting prepare all your herbs, fruits, and vegetables. If you like, you can practice designs using a large cutting board then transfer them to the stretched dough before baking.
- When ready to bake the focaccia remove the dough from the refrigerator and allow it to rest at room temperature for 30 minutes.
- Dimple the surface with oiled fingers to create divots for oil to collect
- Drizzle a good amount of olive oil onto the top of the dough. Sprinkle with flaky salt
- Allow the dough to rest again for 15-30 minutes then decorate the top any way you like with your chosen herbs, fruits and veggies.
- Brush all the herbs, herb flowers and veggies with more oil to prevent burning
- Bake in 450F. oven for 20-25 minutes or until focaccia is beautiful golden color
- This bread is best enjoyed the day of baking. Leftovers can be refrigerated and reheated at 350F. 5-10 minutes.
RECIPE NOTES
This easy focaccia recipe is indulgent and delicious. I used my Ankarsrum mixer to make my bread, using the dough hook and side scraper. I finished kneading the dough on a floured surface because I love the way it feels in my hands.
The dough can be stretched and chilled overnight to develop the flavor, but it's not necessary if you're in a hurry to make dinner. Just stretch the dough onto an oiled sheet pan, or baking sheet and allow it to rest refrigerated for 25 minutes.
I wasn't sure how some of the herbs and herb flowers would hold up under the extreme temperature required to bake the focaccia bread, so I decided to test all of them.
I was pleasantly surprised by the sturdiness of the micro herbs especially the borage leaves and micro dill. The microchives all but disappeared, leaving a wonderful flavor on the crust of the Tomato Herb focaccia. I'll add more the next time I make it.
All of the herb flowers and blooms lost their color during the baking process however, their shape and sizes stayed pretty much the same. It's easy to add a pop of color by tossing on a few fresh flowers and herbs right before serving.
The blueberries burst slightly and juices dripped down the edges of the bread. I didn't mind the effect but if you want a more pristine bread use raisins dried blueberries or cranberries.
The plums were delicious but left the bread a little soggy. I suggest slicing them less than ¼ inch thick using a very sharp chef's knife.
Once you've completed all of the steps above, add fresh basil after baking the focaccia bread as it turns black and bitter when baked. I substituted the microborage leaves in lieu of basil for their superb color and shape.
BEFORE AND AFTER PICS
There is a marked difference in the color and texture of the herbs and vegetables after baking the bread.
Below are photos to help illustrate the differences:
DESIGN IDEAS
If you're worried about design ideas start by thinking of themes or flavor combinations. Once you have your concept in mind you can start collecting your ingredients. You can slice veggies, and if you're feeling adventurous you can use cookie cutters to make designs.
Arrange your ingredients on a piece of parchment or foil until you are happy with the design. Transfer the ingredients to the stretched dough once you've found your artistic direction. Don't forget to brush them with olive oil before baking.
If you like what you see here...
You can order Fresh Origins products at Sweet Gourmet Botanicals online HERE


A.Ball
Excellent idea. I make focaccia regularly to take to family and this has given me ideas to decorate it.
Thank you.
athomewithrebecka
Dear A. Ball, thank you for visiting At Home with Rebecka and leaving a comment. Making focaccia art bread is one of my all-time favorite projects for interactive dinner parties and with my grandchildren. They turn out so beautiful when baked and satisfy my inner artist! I’m delighted to share some inspiration for your next focaccia baking adventure. Please keep in touch and let me know how yours turn out! Happy Baking!